 Setlist
Band Finances
Most bands end up handling cash somehow. Guitar strings, rehearsal rooms and PA equipment all cost money, and gigs bring some back in. In my experience, dealing with it is usually left to one band member, or it's tracked through a shared spreadsheet that nobody quite trusts. The Band Fund is Setlist's answer to that: a simple, shared place to track the money coming in and going out of your band, sitting alongside your songs, setlists and events.
This guide provides a quick walk-through of the whole thing - recording transactions, keeping them organised, attaching receipts, the important settings, and also how it hooks into the event calendar so your gig fees can get automatically recorded.
Finding the Fund
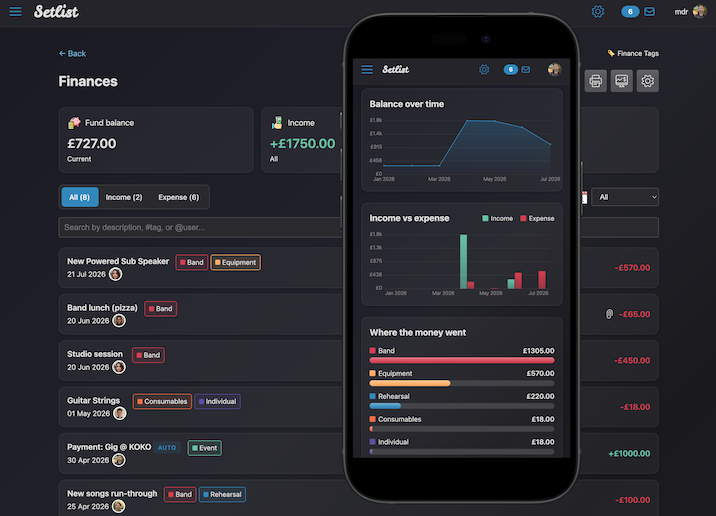
You'll find Finances in your band's homepage (under the "Band Management" section), and there's a Band Fund card on your dashboard showing the current balance and a few recent transactions at a glance. Click through to open the full Finances page.
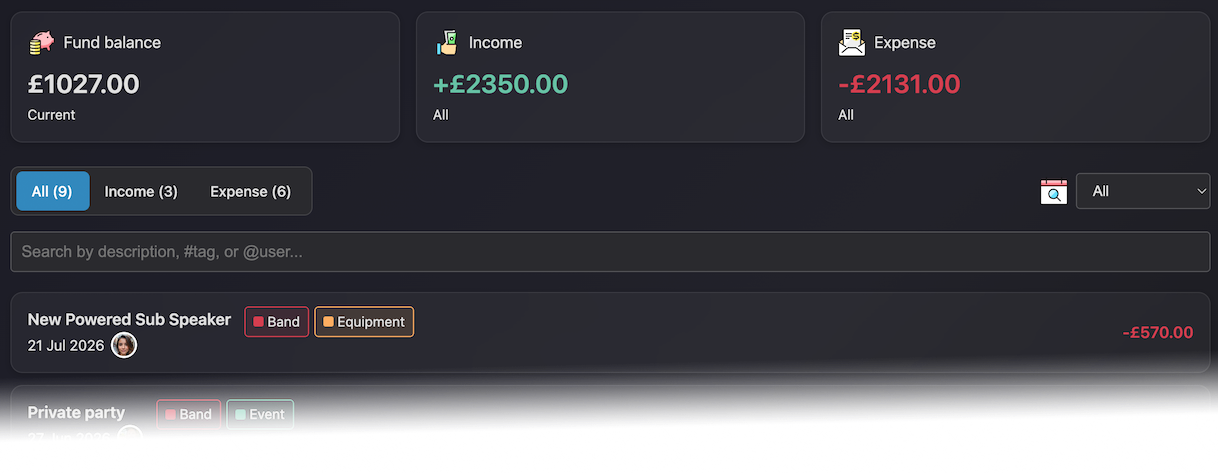
At the top you'll see three summary boxes: your current Fund balance, and the Income and Expense totals for whatever time period you're looking at. Below that is the list of transactions itself.
Recording money in and out
Every entry in the Fund is recorded as a transaction, and it's one of two kinds:
- Income - money coming in. Gig fees, contributions from members, selling old equipment, and so on.
- Expense - money going out. New strings, van hire, rehearsal room fees, food and drinks etc.
To add one, click + Add Transaction, then fill in a description, the amount, whether it's income or expense, the date it happened, and any tags you'd like. After saving a transaction, you can attach a receipt or invoice and add further details like notes or comments.
Editing from the detail view
Click any transaction to open its detail page. This is also where you can edit things like the details, tags, notes and attach receipts. Click Edit on any section, make your change, and save. It's the same pattern used on the song pages, so it should feel familiar.
You can also leave comments on a transaction, which again uses the same system as the rest of the app so you can give bandmates a mention with @theirname to give them a nudge.
Keeping it organised
Once you've got more than a handful of transactions, tags and filtering are what keep your finances readable.
Tags
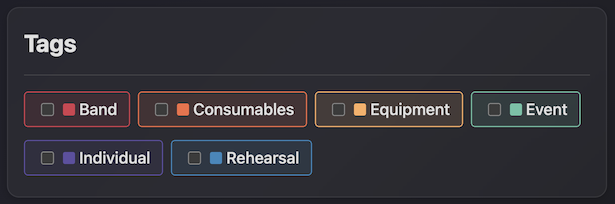
Every band starts with a default set of finance tags - Event, Rehearsal, Equipment, Consumables, Individual and Band - and admins can add, rename, recolour or remove them to suit how your band thinks about money. Assign as many tags as you like to a transaction.
Filtering and search
The Finances page gives you a few ways to narrow things down, and they all feed into the summary totals at the top so the figures always match what you're looking at:
- A pill toggle to switch between All, Income, and Expense.
- A time-period dropdown - Month to date, Year to date, Last 30/60 days, All, or a Custom range.
- A search box that does more than plain text. Type a
#tagto filter by tag, or@usernameto filter by who added the transaction, and combine those with ordinary words that match the description.
#tag and @user work the same way here as they do when searching songs and events.
Receipts
Each transaction can carry a receipt or invoice which can be in PDF, PNG or JPEG formats. Open the transaction, and click the Upload receipt button (a paperclip) to upload one, and it's stored against that entry for whenever you need it.
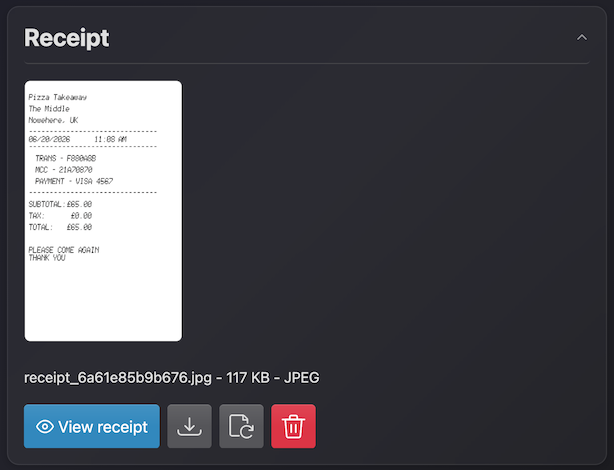
Receipts have their own storage allowance per band (separate from the Rehearsal Room's audio storage) and you can see your usage on the band preferences page. There's no retention policy, so receipts are kept indefinitely - if you're running low on space, remove receipts you no longer need or get in touch about more space.
How it works with events
If you use the calendar to organise gigs, Setlist can turn a paid gig into an income transaction for you automatically, so there's no need to remember to log it manually after the show.
When you create an event, you can mark it as a paid event and enter the agreed fee:
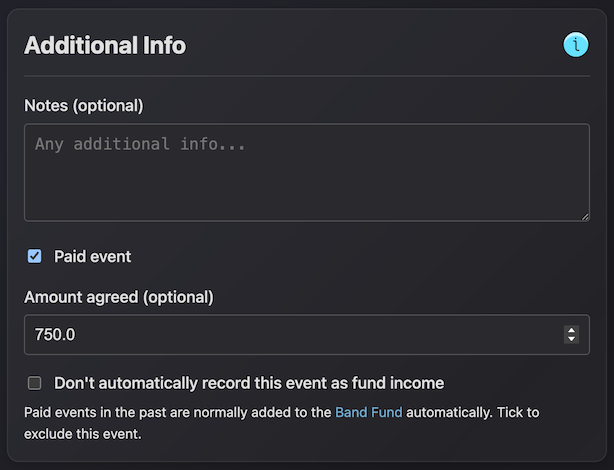
Once that event is confirmed and its date has passed, a background job (it runs once a day) creates a matching Income transaction in the Fund. These auto-created entries can be easily identified, because they:
- Carry a small "Auto" badge so you can tell them apart from ones you've added by hand.
- Link back to the event they came from, so you can jump straight to the gig.
- Are attributed to whoever created the event, and get the Event tag by default.
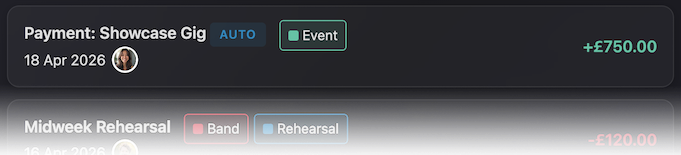
A few things worth knowing about how it behaves:
- An auto transaction is a snapshot of what was agreed. If you later change the fee on the event, the transaction that's already been created won't update itself - so if a gig pays differently on the night, just edit the transaction directly.
- If you want to skip auto-ledgering for one specific event, when you permanently delete its auto transaction you'll get the option to stop it being recreated.
- You can turn the whole feature off in the Fund settings if you'd rather log everything yourself (see below).
Settings
The Fund settings (a cog icon in the Finances header, admins only) hold a few things worth setting up early.
Currency symbol
Set whatever symbol suits your band. It's free-form text, so £, $, € and so on all work. It's used everywhere amounts are shown.
Opening balance
When you first start using the Fund, you've probably already got some money in the real-world pot. The opening balance is where you tell Setlist that starting figure, so your balance is right from day one without having to invent a fake "starting cash" transaction that would skew your income totals.
Auto-ledger toggle
If you'd rather not have gig fees logged automatically, there's a toggle here to switch the event auto-ledger off entirely.
Voiding vs deleting
Getting rid of a transaction is deliberately a two-step process (like cancelling and then deleting an event from the calendar), so you can't wipe out a record by accident.
First, you void the transaction by clicking the red X button. It will stay in the list (greyed out) but won't count towards your balance or your income/expense totals. Perfect for a mistake or a cancelled payment where you still want a trace of what happened. You can undo a void at any time.
If you actually want to completely remove a transaction, you can permanently delete it after it has been voided by clicking the trash/bin icon. This removes it for good, deletes up any attached receipt, and notifies the band.
Reports and printing
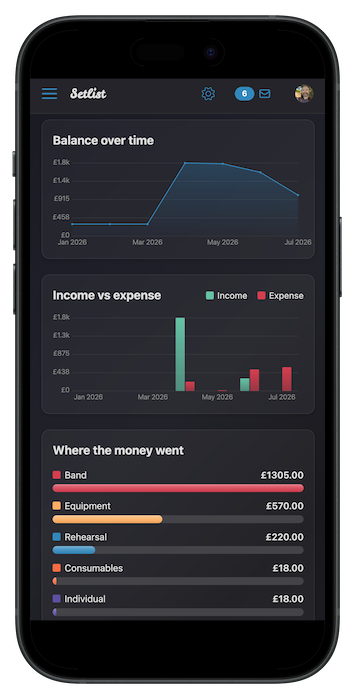
For a closer look at the figures, the Report page gives you charts and stats - balance over time, income versus expense, your most common expense tags and so on, for whatever period you choose.
When you need a hard copy, the Print to PDF option produces a simple printable ledger, with options for the date range, transaction types, and whether to include tags and a running-balance column.
A few best-practice tips
A few tips to keep the Fund useful:
- Log little and often. A transaction takes seconds to add. Adding expenses in as they happen (or snapping the receipt straight after buying something) beats trying to reconstruct spending from memory.
- Attach receipts whenever possible. Especially larger purchases or anything shared unevenly between members. Hopefully, you won't need to refer back to them but if you do (e.g. for tax reasons) you'll be glad you saved them. When using the site on mobile, clicking the "Choose file" button usually gives you the option to open the camera directly which makes snapping receipts quick & easy.
- Set the opening balance once and forget it. Resist the urge to "correct" the balance by editing it later - add a transaction instead.
- Agree a tagging convention as a band. Tags are only useful if everyone uses them the same way. A quick chat about what goes under Equipment (e.g. PA equipment) versus Consumables (e.g. Guitar strings, drum sticks) pays off when you look at the report later. Likewise with Band vs Individual expenses and so on.
- Let the events feature do the gig admin. If you enter gig fees on an event, let the auto-ledger log them. It's less to remember, and it also keeps a record of your gig income tied back to the actual events.
- Void, don't delete, when in doubt. Keeping a greyed-out record of a cancelled payment is often more useful than making it vanish entirely.