The Rehearsal Room
The Rehearsal Room is Setlist's built-in practice tool. You can upload an audio recording of a song, then use the waveform player to mark up sections, slow them down, loop tricky parts, and add notes. These are unique to each band member (so everyone can work through a song in their own way) and you can also see a read-only view of your bandmates sections/notes.
Uploading Audio
Before you can use the Rehearsal Room for a song, a band admin will need to upload an audio file:
- Go to the song's detail page
- Click the audio upload icon (it's next to the artwork and online lookup buttons)
- In the upload dialog, select your audio file
- Tick the rights disclaimer checkbox to confirm you have permission to use the recording
- Click Upload
Once uploaded, the song will appear in the Rehearsal Room and a play icon will also show next to it in the song library pages.
Supported formats
You can upload most common formats like MP3, M4A/AAC, WAV, and FLAC files, up to 50MB per file. However, each band only has a small amount of storage (see below for reasons why) so you'll probably want to stick to MP3 or M4A files for efficiency.
Rights and permissions
Please only upload audio that you have the right to use - i.e. your own rehearsal recordings, original demos, or material with appropriate licences. When you upload, you'll be asked to confirm this via a checkbox. See the Terms & Conditions for full details on the audio upload policy.
Replacing or removing audio
If you upload a new audio file to a song that already has one, the old file will be replaced. This will delete all practice sections and notes for every band member though, so use it carefully! Band admins can also delete audio entirely, either from the song detail page or from within the Rehearsal Room - look for the red "trashcan" icon.
Finding the Rehearsal Room
There are several ways to get to the Rehearsal Room:
- Band homepage - click the "Rehearsal Room" tile to see all songs with audio
- Song library - click the play icon next to any song that has audio attached
- Song detail page - the audio card includes an "Open in Rehearsal Room" link
The Rehearsal Room index page lists all songs in your band that have audio. Much like the Song Library screens, you can search by title, artist, or #tag, and sort by song name or date added.
The Practice View
When you open a song in the Rehearsal Room, you'll see the full practice interface.
Song information
At the top of the page you'll see the song's artwork, title, artist, duration, state badge, and tags. On the right, a storage bar shows your band's current audio storage usage and how long until the song will expire.

The waveform
The waveform is the centrepiece of the practice view. It shows a visual representation of the audio and highlights your current playback position. If you've created sections, they appear as coloured overlays on the waveform. Click anywhere on the waveform to seek to that position.

Playback controls
The transport toolbar sits below the waveform.

From left to right, these buttons are:
- Rewind to start - jump back to the beginning of the song
- Rewind to section start - jump to the start of the current section (or the start of the song if there are no sections)
- Play / Pause - start or pause playback
- Stop - pause and rewind to the start
- Skip to next section - jump to the start of the next section
On the right side of the toolbar you'll see:
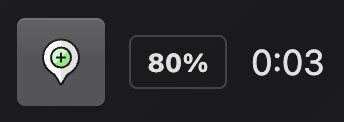
From left to right, these functions are:
- The add section marker button (the + icon)
- A speed badge showing the current section's playback speed (when it differs from 100%)
- An elapsed time counter
Keyboard shortcuts
The Rehearsal Room supports keyboard shortcuts for faster navigation (i.e. I to insert a marker at the current playback position, or the arrow keys to jump between sections). Click the shortcuts icon in the top-right corner of the page to see the full list.
Working with Sections
Sections are the core of the practice workflow. They let you break a song into labelled parts (intro, verse, chorus, bridge, etc.) with individual speed and loop settings.
Creating sections
- Click the + button in the toolbar to enter marker mode (the button will appear highlighted)
- Click anywhere on the waveform to place a marker
- A section is automatically created from the marker to the next marker (or to the end of the song)
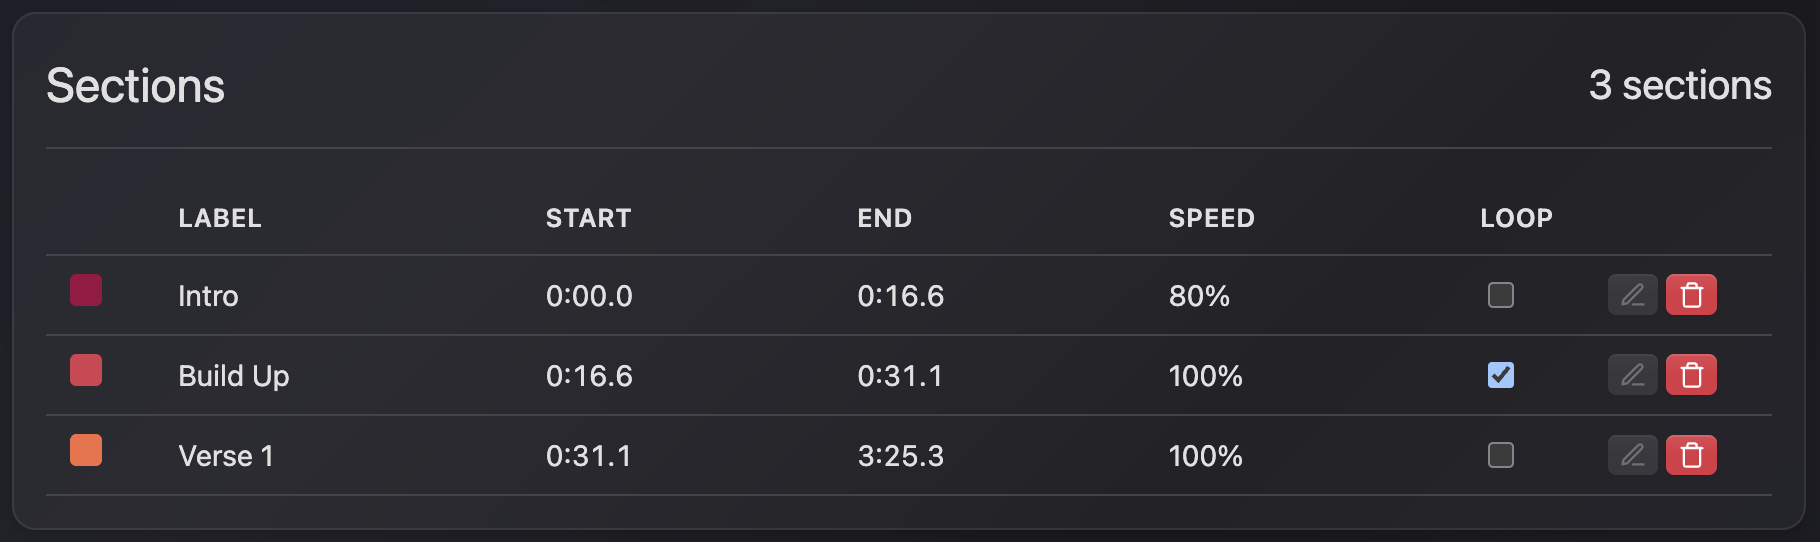
Editing sections
Each section appears as a row in the sections table below the waveform. Click on any part of a section row to interact with it:
- Label - click to edit. Give sections meaningful names like "Intro", "Verse 1", "Chorus".
- Start / End time - click to fine-tune the timestamps if the marker placement wasn't quite right. Times are in MM:SS.ss format and let you adjust things down to 10ths of a second granularity.
- Speed - use the slider to adjust playback speed from 1% to 100%. This is great for slowing down a fast passage to learn it note by note, then gradually building up to full speed. It does this without altering pitch although you will notice artifacts at slower speeds!
- Loop - toggle the loop icon on a section. When enabled, playback will repeat that section continuously until you manually move on.
- Colour - click the colour swatch to choose a different colour from the palette which will also change the section overlay colour on the waveform.
- Notes - click the notes icon to expand a free-form text area below the section. Use this for anything you want to remember about that part, and use the
Xbutton to close it.
Deleting sections
Click the delete icon on a section row to remove it. After confirming, it'll be removed and adjacent section boundaries will be recalculated.
Customizing the Waveform View
To the top right of the waveform display is a cog icon. Clicking this produces a pop-up where you can select your preferences for how the waveform display should appear:
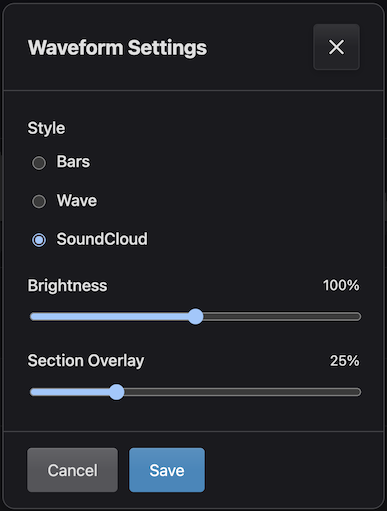
As well as selecting the overall brightness and level of overlay colour to be applied, you can also pick from the following 3 visualisation options:
Bars (The Default)
Uses thinly spaced vertical bars to represent the shape of the audio track
Waves
Sharper, more accurate representation of the audio waveform

Soundcloud
Styled to mimic the appearance of the player on Soundcloud pages

Viewing Bandmates' Sections
If other band members have created sections for the same song, a dropdown appears above the sections table. Select a bandmate's name to see how they've broken the song down. When viewing a bandmate's sections, the screen will update to show their settings but will switch to a read-only mode: You can't edit or alter anything in their sections.
However, a copy button will appear next to the drop-down when you are viewing a bandmate's sections. You can click this to copy all their sections, settings and notes to your own view.

You may find this useful to use as a starting point to create your own sections and practice notes. Note that this will remove any sections you have created!
Printing Sections to PDF
You can export your sections and notes to a printable PDF which can be useful for saving details for future reference, as audio files will be automatically removed after a period of time (see below). There's a "Print to PDF" button at the top of the waveform, when clicked you can generate a PDF document which includes the key song details, followed by a table of your sections with labels, timings, speeds, and loop indicators. If you included notes, they'll also appear below each section.
Audio Retention
The Rehearsal Room is designed as a temporary practice tool, not a long-term audio library or file hosting service. Audio files are therefore automatically removed after a retention period. See the FAQ for a fuller discussion around this.
How it works
Audio files have a set retention period (visible as "Expires in X days" in the practice view). You'll get advance warnings via in-app messages as the expiry approaches. You'll also see a warning "clock" con and tool-tip in the song view, and details in the song detail audio card. When the retention period expires, the audio file and all band members' sections and notes will be permanently deleted.
If you need more time, band admins can renew the retention period by clicking the refresh icon in the Rehearsal Room. This will reset the clock, but renewals are limited - the number remaining is shown in the button tooltip. Once all renewals are used up, the audio will be removed when the final period expires.